Torque Indicator Mounting Bolt Use and Compatibility Tips
When using CHANCE Anchor Tooling, the bolt is crucial! Learn how to select, install, and remove bolts properly in order to avoid tool damage and have a successful helical anchor or pile installation.
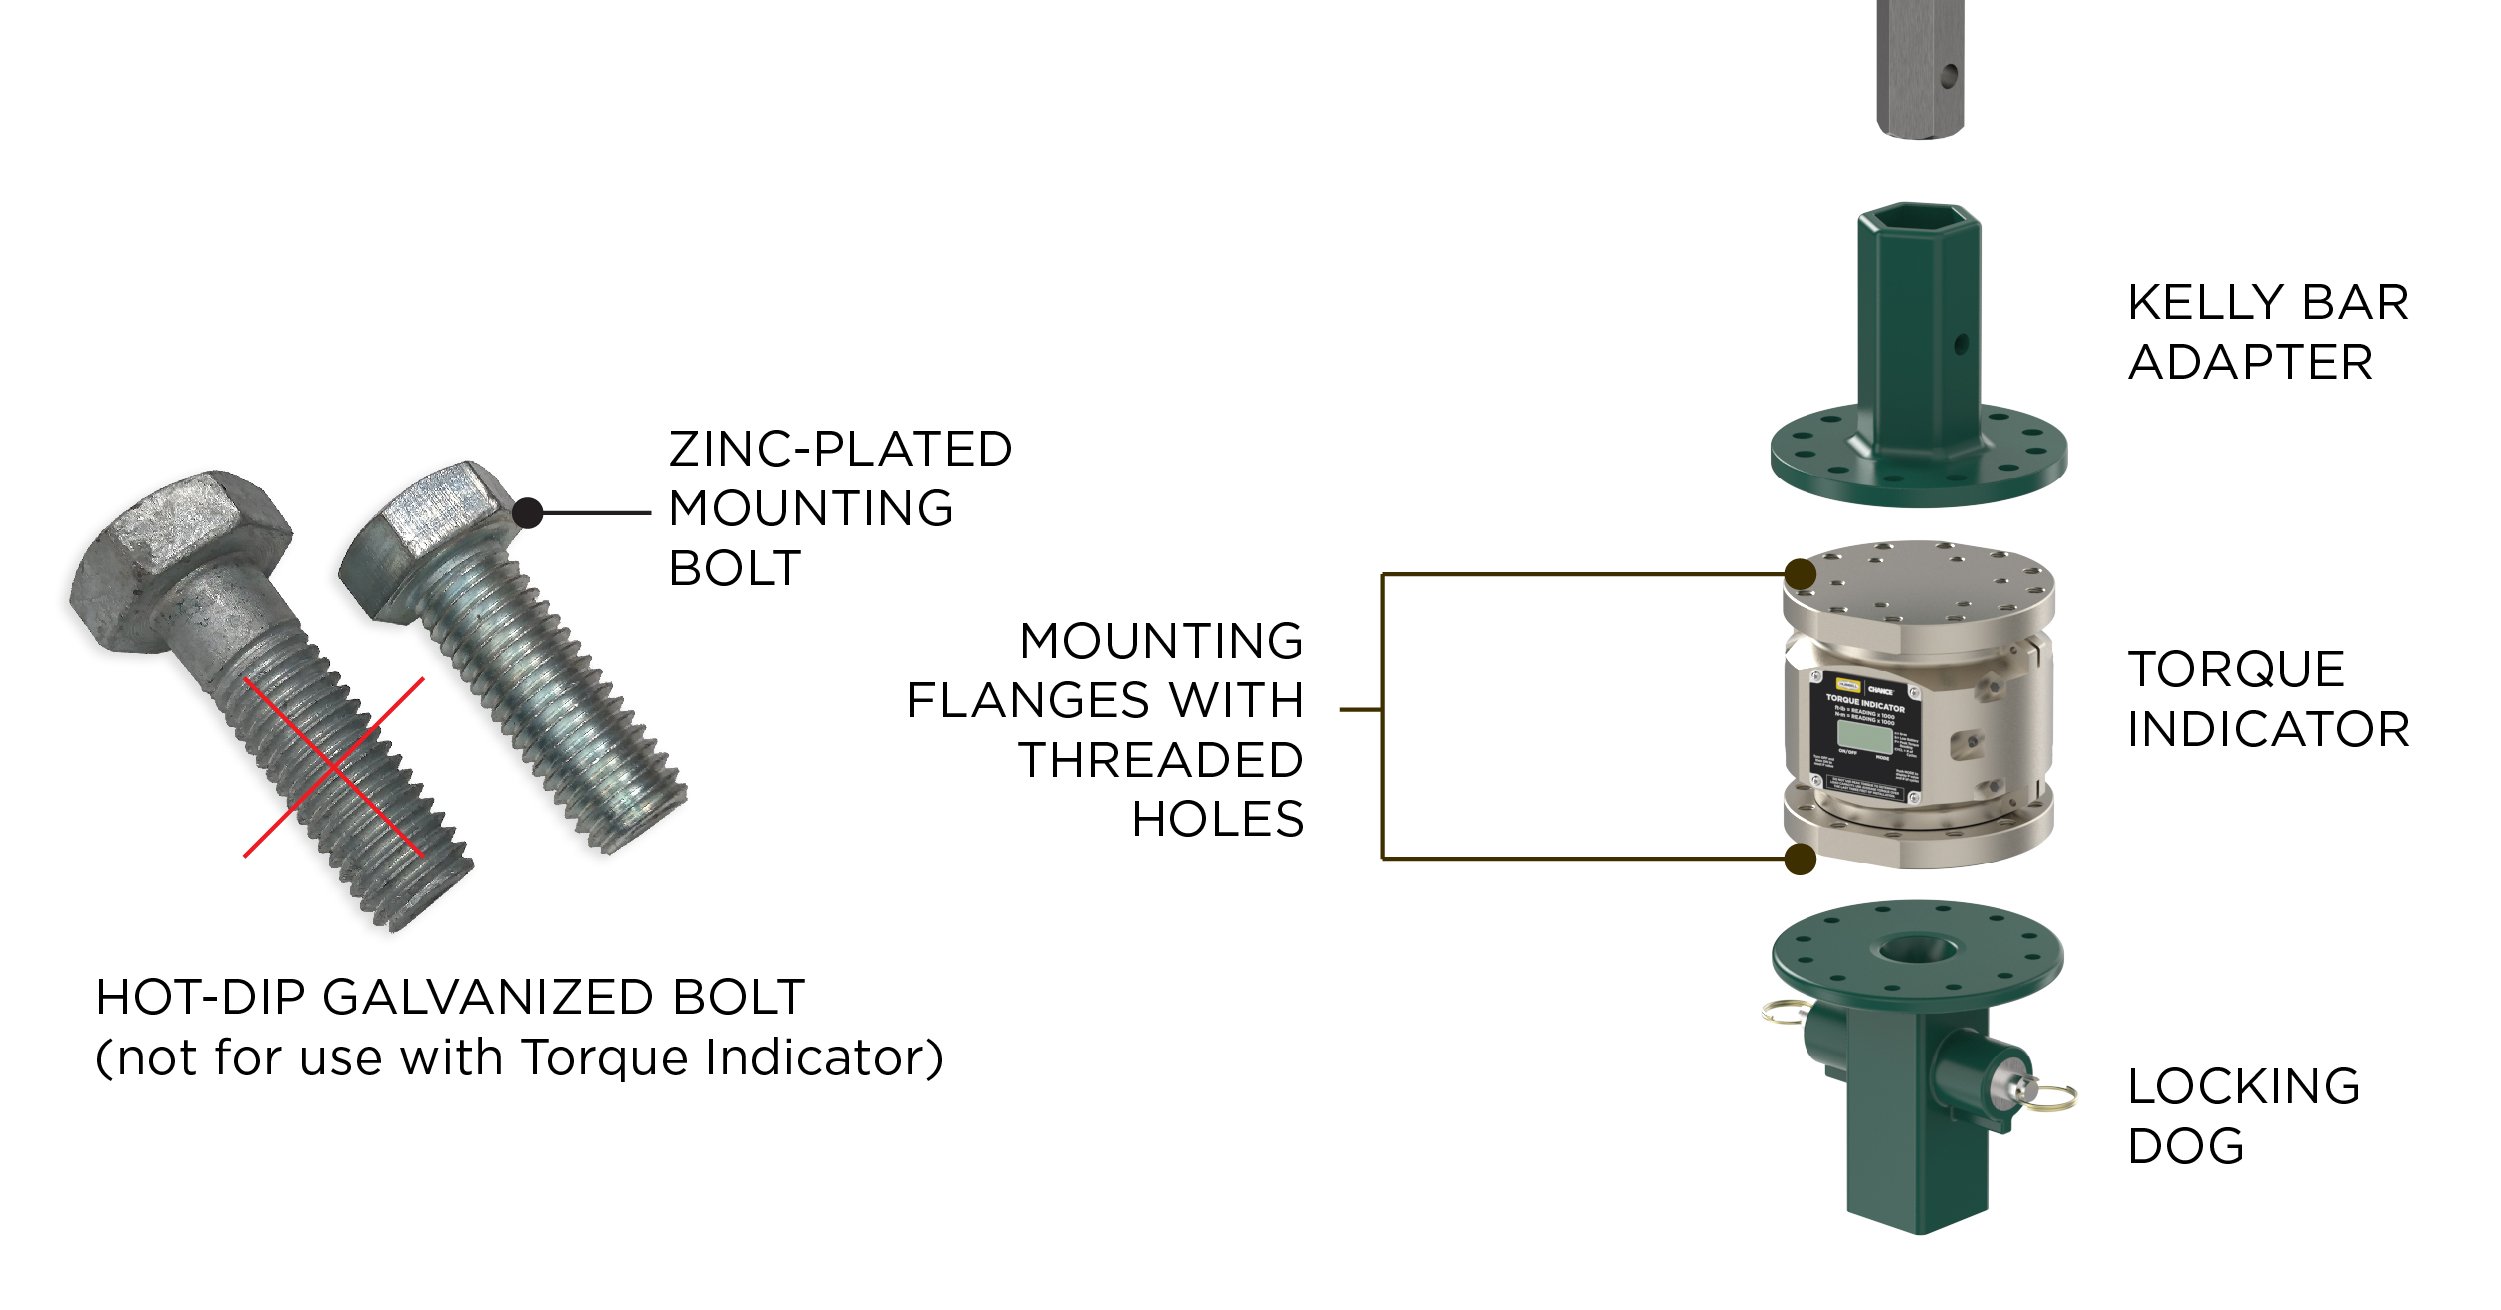
You can use the CHANCE® Torque Indicator in conjunction with a wide selection of CHANCE® Kelly bar adapters and drive tools, and the modular system enables you to easily reconfigure the Torque Indicator and tool assembly for use with various types of installation machines and anchors/piles.
The Torque Indicator has mounting flanges on the top and bottom, and each flange has six threaded holes on a 5-1/4" circle and twelve threaded holes on a 7-5/8" circle. You can install any CHANCE® Kelly bar adapter or drive tool with a 5-1/4" or 7-5/8" mounting bolt circle on the Torque Indicator. Due to the way the mounting bolts screw directly into the Torque Indicator flanges, you must exercise some special care when installing and removing tools. To minimize wear and damage to the mounting bolts and maximize their service life, follow these procedures when installing or removing a Kelly bar adapter or drive tool:
-
- When installing, screw in all the bolts until they are snug against the lock washers then tighten them to the torque specified in the table below.
- When removing, loosen all the bolts about 1 turn to relieve the lock washer force then remove the bolts.
It is sometimes difficult to get all the bolt holes properly aligned when installing a tool on the Torque Indicator. Leaving the bolts loose until they are all screwed down to the lock washers allows the tool to move as needed while the remaining bolts are screwed in. If you tighten any bolt completely before all the bolts are screwed in and there is misalignment between the tool and Torque Indicator bolt holes, the threads of the remaining bolts may be damaged by scraping against the sides of the tool's bolt holes when the bolts are forcibly screwed in through the tool that is already locked in place.
The mounting bolts clamp the tools to the Torque Indicator and act as pins to transmit torque from the installation machine to the anchor/pile. When a high torque load is applied through the Torque Indicator during anchor/pile installation, the tools rotate from their original position until the sides of their bolt holes are bearing against the mounting bolts. The clamping force of the bolts holds the tools in this position with residual load against the bolts. If you remove any bolts before all the bolts are loosened slightly to relieve the binding from the residual load, the threads of the bolts being forcibly removed may be severely damaged from scraping against the sides of the tool's bolt holes.
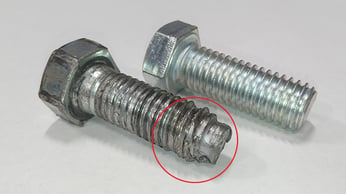 Shown is a bolt severely damaged from being removed before all bolts were loosened (left) next to a new bolt (right). The threads at the tip of the damaged bolt were ripped off and left lodged in the Torque Indicator bolt hole. The debris was pried out of the bolt hole and a tap was run through it to remove residue left from the bolt. There was no damage to the Torque Indicator threads—a testament to the durability of the Torque Indicator.
The Torque Indicator's mounting hole threads will not accept the hot-dip galvanized bolts provided with CHANCE® Kelly bar adapters and drive tools. The hot-dip galvanized fasteners are for use when you assemble a Kelly bar adapter and drive tool without a Torque Indicator. The Torque Indicator is supplied with sets of zinc-plated bolts and lock washers for both mounting bolt circles. Always use the plated bolts with the lock washers and replace them with equivalent fasteners when they are worn or damaged. Using bolts longer than the original bolts could result in damage to the Torque Indicator if the bolts screw in too far. Using bolts that are too short or lower in strength is unsafe as the bolted connection may fail during use. CHANCE® Catalog number C3031757 is available as a complete package of replacement bolts and lock washers. This table contains useful information about the mounting bolts used with the Torque Indicator:
|
BOLT CIRCLE DIAMETER |
# OF BOLTS PER TOOL |
BOLT TYPE |
TIGHTENING TORQUE |
|
5-1/4" |
6 |
SAE J429 Grade 5, 1/2" - 13 UNC - 2A, 1-3/4" long, fully threaded, zinc plated |
75 ft∙lb |
|
7-5/8" |
12 |
SAE J429 Grade 5, 5/8" - 11 UNC - 2A, 2" long, fully threaded, zinc plated |
95 ft∙lb |
Get the instruction manual for C3031836 Wireless Torque Indicator.
Recommended Posts

How to Specify Helical Piles: A Practical Guide for Engineers

Streetlight Foundation Design: ASD vs. LRFD Explained
